Before we jump right into the subfloor process, I need to re-visit the discussion about blanking the window spaces. First, I did a little more digging and discovered that the OEM fiberglass side panels ARE held on with rivets. The rivets are just hidden by the windows on the top and bottom.
This is bad news and good news. The bad news is that I needed to figure out how to use rivets (and not just trust the adhesive), but not have them visible, because I don’t want them to be the only rivets visible on the coach. The good news is that I have figured out how to do it and it means that I can do it myself instead of paying a body shop. (This is really good news because I couldn’t get a body shop to even give me a quote. They are all full of RV insurance repairs and aren’t really interested in one-off projects.)
I have acquired aluminum “deep J channel” and aluminum angle which I can rivet together and then rivet to the frame of the coach. This will allow me to hide the rivets behind the panels AND control the depth of the spacing of the surface from the frame (to be flush with the windows. So, as soon as all the parts arrive, I can start assembling all the pieces while I wait for the fiberglass panels to be manufactured.
Sub Subfloor…
There were a couple of decisions to be made before the subfloor could be installed.
- Insulation and sound deadening – I have seen a number of ideas on insulating floors and controlling sound, all with various pros and cons. In my case, I am working with limited head room. Frame to frame, I only have around 6.5 feet at the center aisle. So, doing something like sandwiching 1 inch insulation board between layers of wood in the subfloor just isn’t a viable option. I needed to come up with something much thinner.
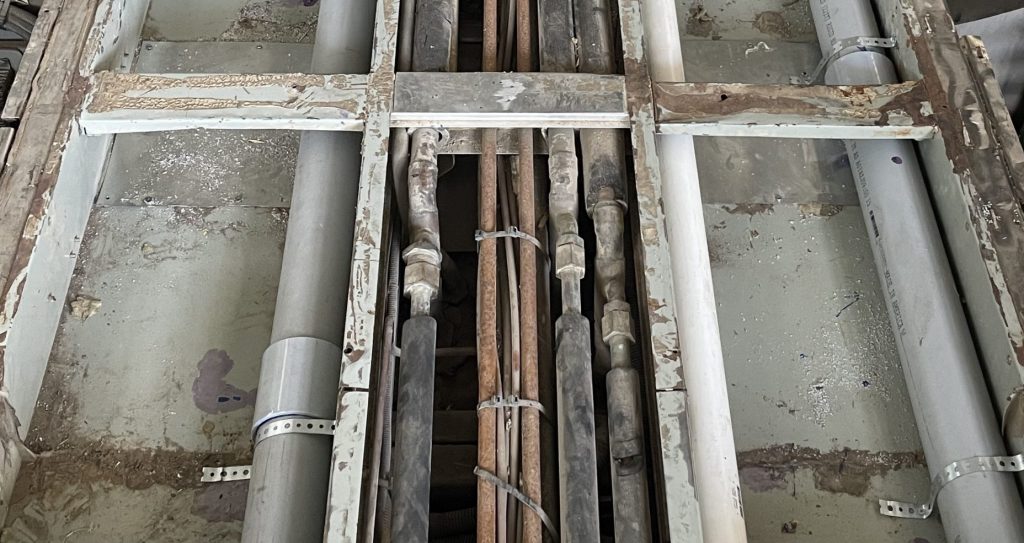
- Access under the floor – For everything in the front of the coach (over the bays), access is easy. However, the back half of the bathroom and the bedroom are not accessible from underneath, so any plumbing or electrical needs must be accommodated before the subfloor goes in. I already decided that I’m not furring the side walls, so there will be no wiring in the exterior walls.
Because we have already confirmed the floorplan in the actual space, I know exactly where the interior walls, cabinets, and plumbing will be. This allows me to approach the situation much as if I was running electrical and plumbing under a concrete slab. Because I have the original air duct chambers running well back into the rear of the coach on either side of the the center, I can pre-stage access before I insulate and put the subfloor down.
So, on the passenger side of the coach, I ran a 3 inch conduit from above the electrical bay back to where I need to bring the electrical circuits for the bedroom up into the interior bedroom wall (between the bedroom and bathroom.) On the driver’s side, I ran another 3 inch conduit and a 2 inch drain line from above the plumbing bay to under where the bathroom cabinet will be. The 3 inch conduit will give me a place to run the PEX supply lines for the bathroom sink and washing machine, and the 2 inch drain line will also handle both the bathroom sink and washer. The key is having precise measurements from specific (above-floor) reference points so that I can access the ends of the pipes once the subfloor is in place.
That done, phase 1 of the insulation could begin. This phase focused around what insulation could I put under the frame itself. This comes in two forms.
In the far rear of the coach, over the engine area, there are shallow (1 inch-ish) “trays,” which really don’t give you much space to work with. Unfortunately, this is also where you need the most sound deadening and serious heat transfer prevention.
In this area, I decided to use a specialty product made specifically for such situations; Soundown Sound Stop with 1lb Barrier. It is used used in the marine industry for engine compartments. It is two layers of foam sandwiching a layer of sound deadening, with a reflective barrier, all in a 1 inch depth. This was perfect to go in the “trays.” I will also use it as I frame out the rear cap (for cabinetry) on any surface directly against the engine compartment.
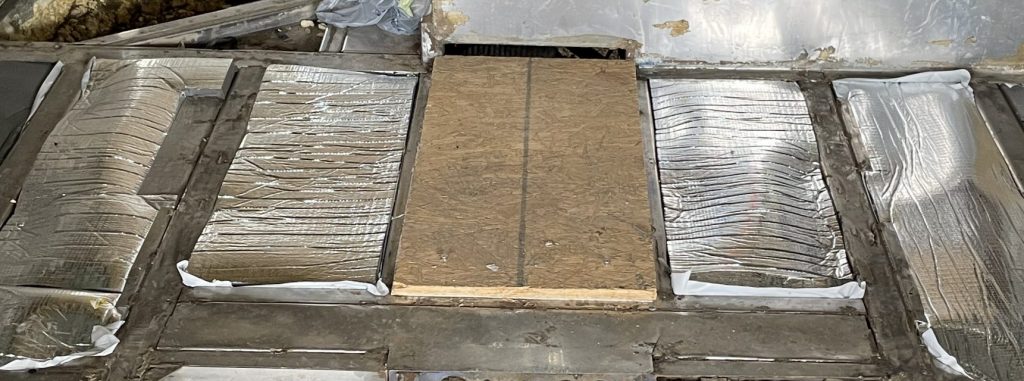
The second area below the frame is the spaces over the wheels and other under-frame cavities (center channel, ducts, etc.) For these spaces, I just went with R30 Rockwool (primarily because I HATE working with fiberglass insulation.) However, I did notice during deconstruction that these spaces over the wheels are not water-tight from below, so I did put down a layer of plastic under the insulation to keep it somewhat protected.

Note: There is a third under-frame area which is the places exposed to the bays along the sides. When I start working in the bays, I will be putting foam board insulation and another layer of sheathing against the subfloor from the underside.
Subfloor…
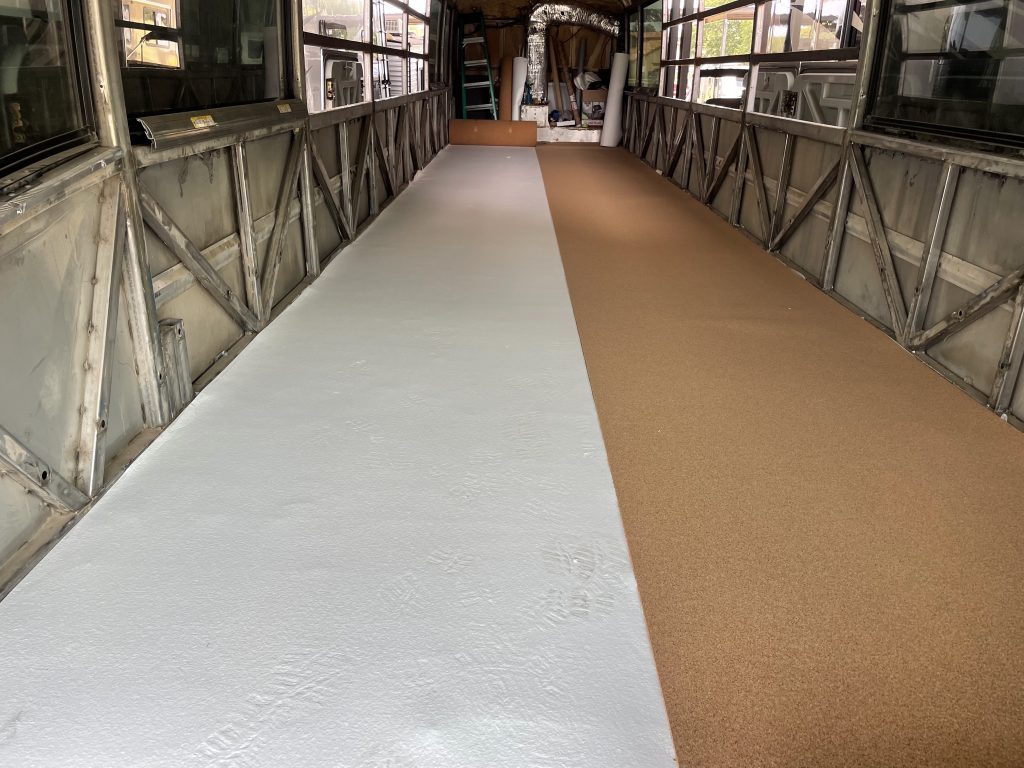
Now for the subfloor itself… What I finally decided was to sandwich several layers for insulation and sound control. From the bottom up, here is what is against the frame itself:
- Plastic moisture barrier (5 mil)
- CeraTex 3170 Ceramic Fiber Paper (1/8″)
- 3/4″ OSB T/G Sheathing
- CeraTex 3170 Ceramic Fiber Paper (1/8″)
- 1/4″ Cork Underlayment
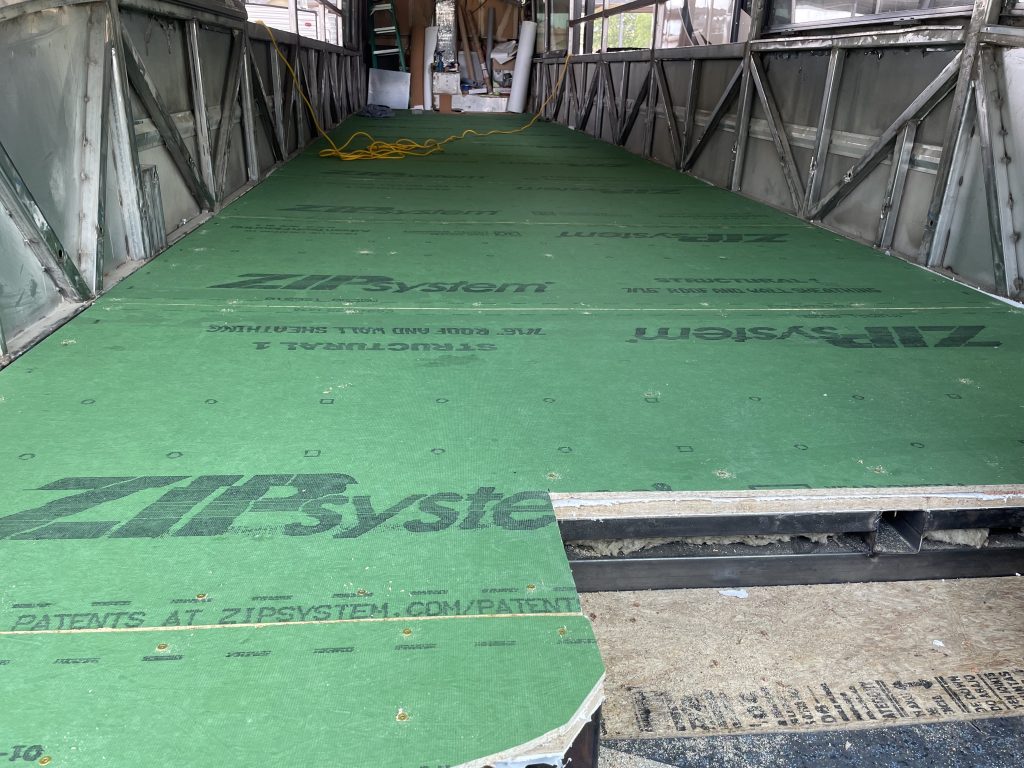
- 3/8″ OSB Sheathing

The CeraTex is a really great product. It is a similar product to EHP Rollboard (even out-performing it in some tests) but at a much lower price.
Of course, installation was not done in a complete stack. First, I attached the first layer of CeraTex and the plastic to the 3/4″ sheathing. I used a staple hammer and MANY staples. The CeraTex is actually pretty dense, but is easy to tear. So, be generous with the staples so it doesn’t shift under the plastic while you are moving the sheathing into place.
The sheathing was then flipped (with the plastic against the frame) and screwed to the frame with appropriate screws. I tried self-drilling screws with ZERO success, so every hole was pre-drilled.
Now that I had a smooth continuous surface to work with, I was able to roll out the next layer of CeraTex and the cork from back to front across the whole surface. I didn’t bother with attaching these as they would be held down by the next layer of sheathing.
(One thing really peeved me… Once I had the CeraTex and cork down and trimmed, I paused for 45 minutes for lunch. By the time I came back to lay down the sheathing, the cork had shrunk almost an inch end-to-end and a half inch side-to-side. Not the end of the world, but annoying.)
The final layer was the 3/8″ sheathing screwed to the bottom layer with deck screws. I did offset the sheets by 2 feet, so the seams from the bottom layer and the seams from the top layer do not line up.
After many hours in the Texas summer heat…
Note: Because I have started getting questions about specific products I am using, I am adding a page to the site where I will provide links to any specialty (not commonly available at a “big box” store) products used in the build.