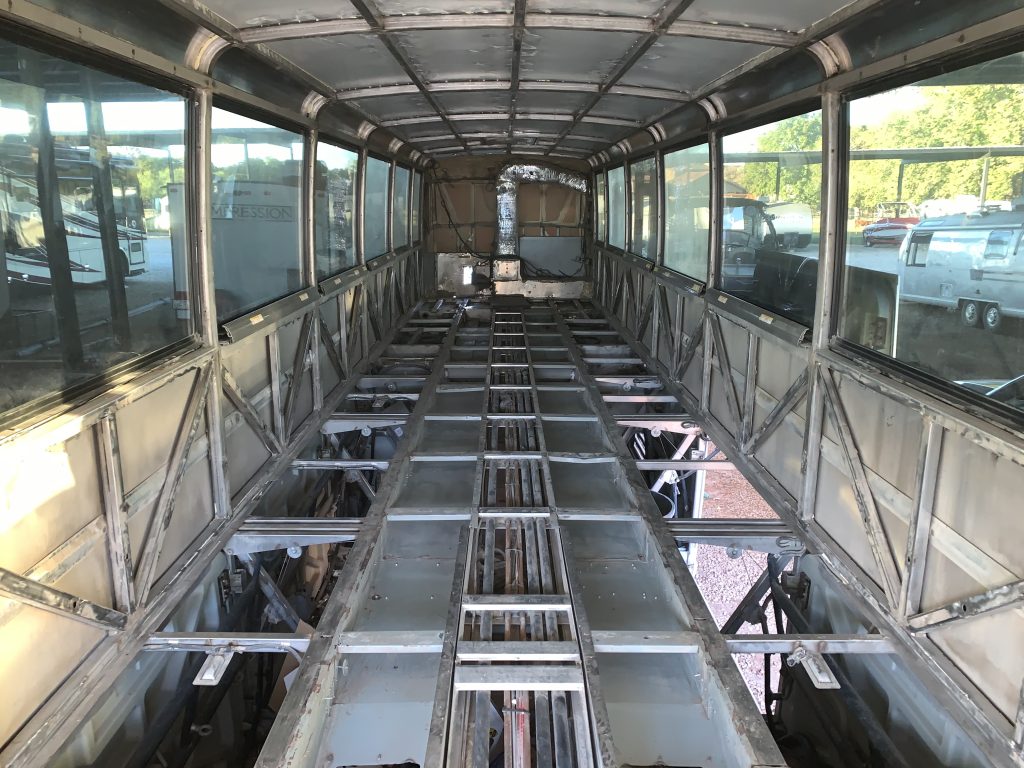
After many hours and more grinding disks that I care to count, demolition is more or less complete.
I say “more or less” because there are a few odds and ends that I may still remove just because they aren’t needed anymore (old wiring, etc.) They aren’t in the way of anything I want to do, but I will probably get rid of them eventually, just to avoid confusion in the future.
Lessons learned:
- The dirt
Oh, the dirt!!! Cars are generally built to prevent outside elements from getting into the body. Buses…not so much. The exterior body seams are NOT sealed. So, over the decades, fine dirt filters in and just fills up any open space. It is inside the walls, under floor panels, over the wheel wells, in the tunnels…. In addition to the fiberglass insulation (under the floors) which was saturated with it, I probably removed 30+ POUNDS of fine dust. I went through a number of air filters on the shop vac. There is still fine dust on every surface, but I will just deal with it as I have to as I seal things back up. It would be useless to wipe everything down now.
The dust did make up my mind on adding a layer of plastic behind the walls and under the floors. There is some debate as to the value of a vapor barrier in these. There is insulation value in having a vapor barrier, but, some of the normal RV-type heating methods add humidity to the air, which can be a problem in a sealed structure this small.
However, seeing how dust infiltrates on these convinced me that the vapor barrier is worth doing, even if I have to add a de-humidifier into the mix.
2. Rust (not)
I was pleasantly surprised to find VERY little rust. Even when I discovered that there had been a leak around the rear cap and sections of the sub-structure “pans” had saturated insulation that left standing water when removed, there was ZERO rust.
I found minimal surface rust on the tops of the airbag mounts and on the occasional bolt, but nothing worth any effort. In theory, I could do hours more grinding and the apply a rust-proof primer. But it took over 15 years and 450K+ miles to get this minimal level of surface rust, so the chances of the existing rust progressing to the point of being a real problem is negligible (at least before the whole chassis is worn out), and definitely not worth the time/money.
3. Troublesome (that’s a nice way of putting it) engineering
I did come across a few things that have made me question some of the engineering decisions when they designed these things.
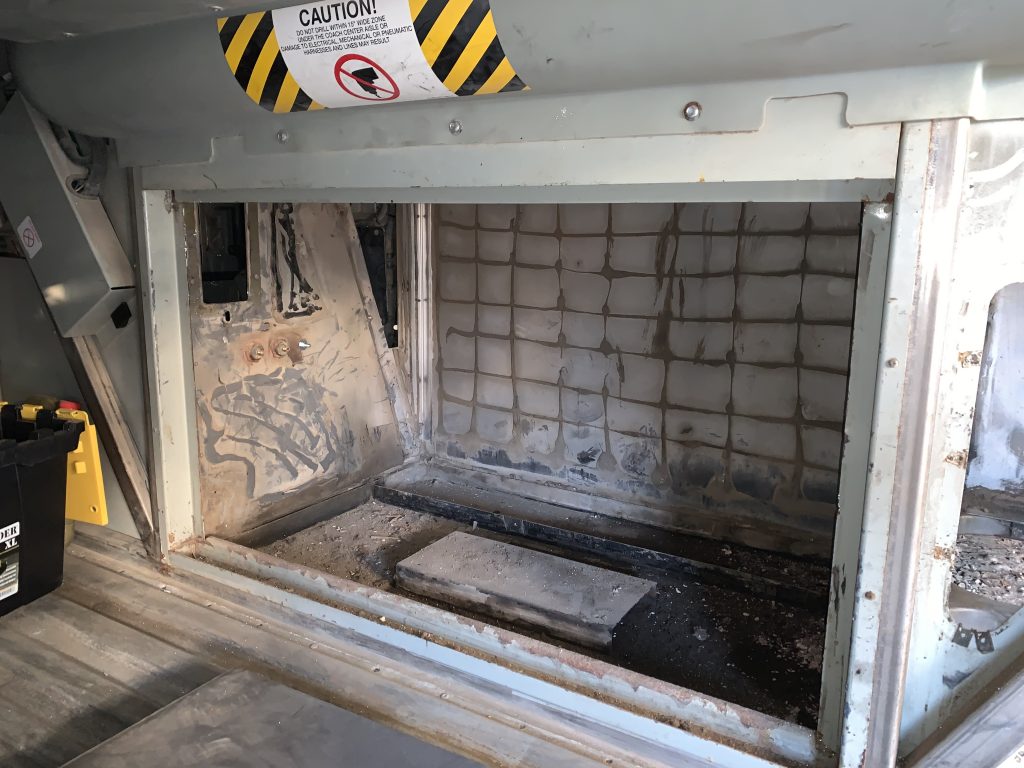
The Black Hole of Despair:
Right behind the rearmost bay, between the original electrical/battery space and where the original AC Condenser was, is a small bit of torture. It housed the heater coils for the original passenger heating system and some squirrel cage fans. They did NOT intend for the coils to EVER be removed. Literally, the opening to get into this space is narrower than the coil assembly.
I actually considered just leaving them in and sealing up the space. But it was just too much space to ignore in the bigger picture. (More on this in a future post…)
So, I began by getting the squirrel cage fans out of the way, doing my best not to destroy them because they might have value for someone (They ended up in a dumpster.) Then, I started cutting off anything that protruded beyond the frame of the coils (plumbing connections, electrical harnesses, etc.,) even the end loops of the actual coils.
And….it was still too big. That left the only option of laying it down and then bringing it forward with one side a foot higher than another, to pull it through the opening. Which sounds ok, until you realize that it weighs a ton AND you have to do this while seated in a bay. Time to phone a friend…
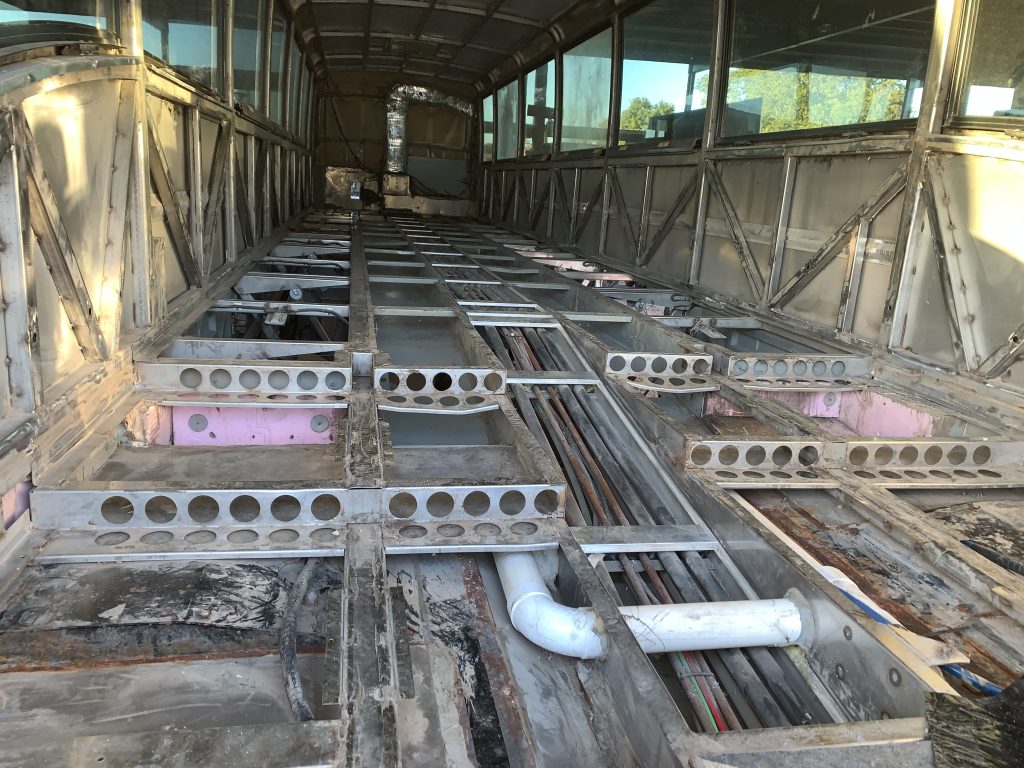
That ONE Cable:
Most of the electrical connections for the engine and transmission run in wiring harnesses in the tunnel under the floor. There is one wiring harness which runs the length of the bus that is NOT in the tunnel. It is in the overhead luggage compartment on the driver’s side. This makes sense for wiring related to passenger amenities located in those overhead compartments (audio, video, lights, etc.). And, for the most part, the designers kept to this model. Except for that ONE cable…
In all the wiring that runs in the overhead rack, ONE circuit is not for passenger amenities. This creates all kinds of frustration when doing a conversion. All that overhead wiring (and two junction boxes) must come out of the overhead racks so the racks can be removed from the bus. (Heaven forbid the people doing this work decide NOT to label and photograph the wiring before disconnecting, or worse, they CUT the wrong wire.)
Then, because that ONE circuit must still exist in the conversion, I must now run a wiring chase down that side of the bus AND find a place to mount the two large junction boxes. I will likely never need to access them, but I have to build them into the plan…
That Lavatory:
For decades now, MCI has been known in the conversion industry for “building the bus around the lavatory.” They made no exception in the J series. And it is not just the structure of the interior walls and fixtures. Removal of the “blue water” pump and the dump systems requires dismantling the entire passenger side of the engine bay. They actually mounted the manual controls to dump the air system to the underside of pump box and mounted the secondary battery terminal to the top of the dump system, with the AC compressor in between those two units.
But, all of that is behind us now….
What’s next?
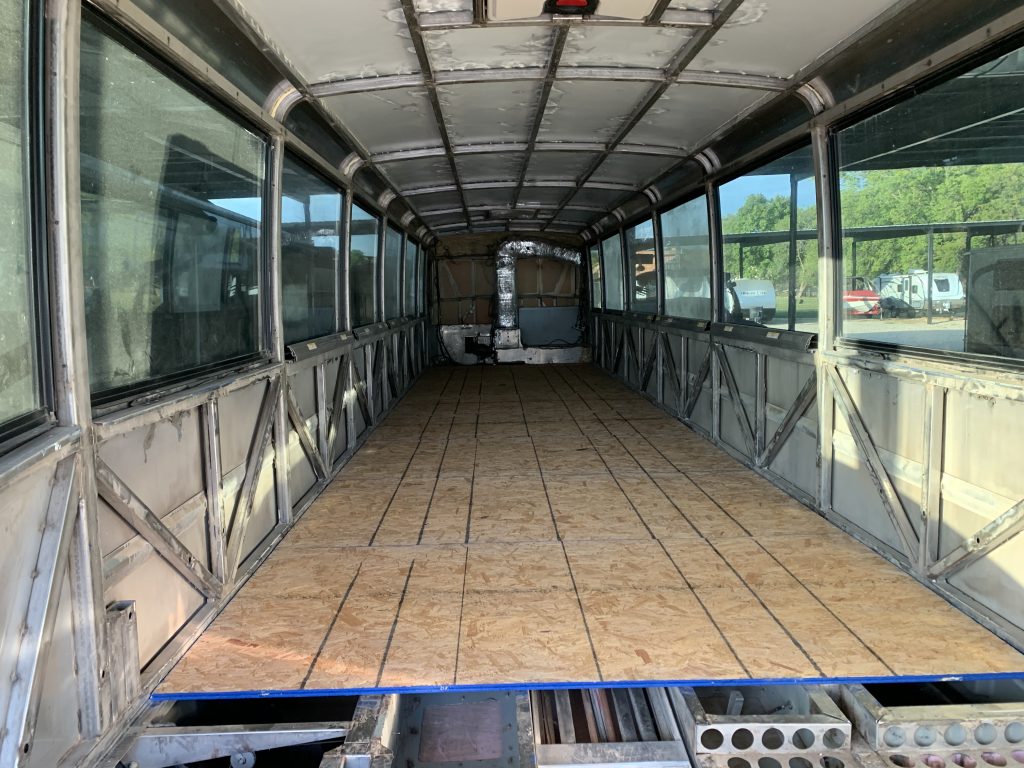
No, the floor is NOT in the bus. That is just an illusion.
The next step is body work. There are two major changes. The first is that some of the windows are coming out and will be replaced by body panels, with appropriate structure behind them.
However, to determine which windows, we need to nail down the floor plan. That needs to be confirmed in the actual space, not just on paper. So, I have temporarily laid down some sub-floor sheets, and we will map out the floor plan with tape. That will allow us to walk through the space and make sure everything is spaced right.

The second major part of the body work is building up the sub-floor in the front. The first three rows were “stadium” (terraced) seating. However, the floor in the conversion will be flat all the way forward. So, the sub-structure in the front needs to be built up to the correct height.
There are also a few other external odds and ends that need to be done to the body (fiberglass repair, leaks, etc.).
Forward…